
A few simple ways to quickly and effectively prepare the substrate for demanding aquarium plants.
Clay Peat Balls root tabs fertilizer

Pinia Clay Peat Balls, to buy in our store, but you can do it yourselves. For this purpose you can use peat and, of course, clay (instead of peat, you can use garden soil, but the balls will be much worse). The clay can be brown, gray, red, no difference. The one you will find. The color of clay depends on the content and the degree of oxidation of colloidal particles of hydrated iron and manganese oxides. It is worth to mention that the percentage of iron and manganese, i.e. what is very important in a plant aquarium depends to a greater or lesser extent on the geographical location, e.g. in the UK percentage of manganese is higher, and most of Europe is dominated by iron. Generally, clay can be found everywhere but they are usually clumps in small quantities. You can find it in gravel pits or look for in the place where excavations are conducted, I assume everyone knows what clay looks like. If we care about high quality and usefulness, it is worth buying a clay from one of the countries in continental Europe. Delivery costs are often bigger, but it’s worth it.
Mix in the 1/2 or 1/3 proportions, so that the mix has more peat. Mix until the mass becomes dense and plastic, you can add water or liquid micro chelate if necessary. The ball should be dried in the sun or on a radiator, you can try to heat it in the oven but then they can crack. If we do not want it to break, we simply use 80% clay, or only clay, and you will also see the effects in the condition of the plants. When placed in the aquarium, they can dissolve if they are not made properly and/or roil the water, it can be used when setting up an aquarium, once or every 2-3 months. At the next application, we do not pull old balls out of the substrate because the clay contained in them has buffering properties and extracts excess minerals from the water giving them only to the roots of the plant.
Pinia Clay and Peat Root Fertilizer,
causes no additional water pollution.
Fertilizer Capsules

Fertilizer Capsules made from Osmocote
In aquarium stores, you can buy labeled fertilizers in capsules of such companies as JBL, Tropica or Ada. These fertilizers, however, have one disadvantage – they cost quite a lot.
For those who do not want to spend a fortune on ready-made fertilizers, we have a proposition in the form of homemade fertilizer capsules that we can do ourselves, without ruining the home budget.
To manufacture our home-made capsules we will need:
– gelatin capsules, preferably size 0 or 00
– Substral Osmocote fertilizer
– Latex gloves and some time and will.
PRODUCTION:
Our task in the “production” of fertilizer capsules is just filling the capsules with our fertilizer and closing them. When buying capsules, we propose to order the largest ones, size 0 or 00 – they are more handy and are able to contain more filling.
Although we work at home, let’s remember about health and safety – we work with chemicals that’s why we recommend using latex gloves.
FERTILIZATION:
Now it’s time for fertilization. We place individual capsules in the substrate around the plants – the capsules placed in this way will effectively feed our plants with nutrients that they take from the substrate. Remember not to overdo it with the number of capsules in the substrate, 15-20 cm and only near plants.
The capsules are best placed in the ground with tweezers. Capsules should be dosen once every few months depending on your needs.
WHY SUBSTRAL OSMOCOTE: SUBSTRAL OSMOCOTE fertilizers is a family of fertilizers for use in our gardens as well as for potted plants and successfully used by aquarists. They occur in several varieties that differ in chemical composition. Osmocote fertilizers are long-acting fertilizers – in the soil they work up to 6 months, in water for less than 2-3 months. Thanks to the gradual release of ingredients, the plants are not threatened by overgrowing and burning, and in the water the gradual release of nutrients favorably affects plants and does not cause sudden attacks of algae.
Disadvantages of osmocote capsules:
First of all, you must always remember that it is a product for use in potting plants, not skillful or too shallow placement in the substrate may cause the water to be turbid.
Also bad is too large proportion of phosphorus to the rest of minerals.
The advantage of this method is the price. This is undoubtedly the cheapest method to enrich the substrate in the aquarium, so also one of the most popular.
Fertilizers Spikes

Fertilizers Spikes
In our homes we often use fertilizer spikes for decorative plants. These fertilizers are available in various varieties (for flowering plants, orchids, etc.) they differ in the proportions of nutrients. These spikes are used to fertilize the substrate of potted plants, but are also well suited for fertilizing the substrate in the aquarium. By feeding the substrate with additional nutrients, we will make our plants more luxuriant and have the right color. Substrate fertilization is an important element of cultivation of plants that take the majority of nutrients by the root.
What kind of fertilizer spikes should I use?
Like the capsules made of Osmocote, fertilizer spikes are a product for potted plants, although often used also in a freshwater aquarium.
As I mentioned above, there are several companies on our market that offer fertilizer spikes. We buy fertilizer spikes in DIY stores and gardening stores. Fertilizer should be selected depending on the offer of the local market and plant density of our aquarium.
For example, SUBSTRAL fertilizer spikes – fertilizer spikes for green plants are a mixture of microelements (NPK 10-6-8 (2))
– Nitrogen (N) -10.7%,
– Phosphorus (P2O5) – 6.4%,
– Potassium (K2O) – 8.6%,
– Magnesium (MgO) – 2.4%
How to use fertilizer spikes?
We divide fertilizer spikes for the needs of aquarium plants by means of scissors for 2-3 parts which we plug into the ground near plants, eg, in the case of the substrate made of Eleocharis parvula, every 4-5 cm at the depth of about 3 cm. The distance and depth of fertilizer application can be increased for other plants. Spikes are best complemented during water changes. By my observations they feed the ground for about two months.
Fertilizer spikes and the risk of algae in the aquarium?
The use of fertilizers under the gravel significantly limits the possibility of appearance of algae in the aquarium – in comparison with water column fertlization. The risk of appearance of algae is smaller in reservoirs with a rich plant density.
The use of fertilizer spikes for potted plants is nothing less than a slightly cheaper alternative to branded aquarium fertilizers such as JBL, Ferropol Root and more.
Remember that this is an additional way to fertilize. Beautiful and healthy appearance of our plants is also influenced by many other factors. We should take into account the requirements of individual plants, the animal density, the intensity of lighting, and the CO2 dosage. All of these factors should be borne in mind when using fertilizers in an aquarium.
Lignite

The use of lignite in the aquarium is just a plus. it can be added to the substrate or simply put into the aquarium as a decorative element.
– acidifies water and maintains a reduced pH, which varies depending on the amount of lignite used, even pH 5.8 was obtained experimentally
– softens water
– is rich in minerals
– inhibits the spread of toxic compounds to plants and animals
– at the right concentration, it inhibits the growth of cyanobacteria from the Oscillatoria genus.
For example, you can specify that 1 kg of lignite contains the following amounts of chemical elements:
phosphorus P 10-25 mg
potassium K 30-150 mg
magnesium Mg 200-600 mg
Calcium Ca 1500-3000 mg
SO4 sulphate 10-20 mg
iron Fe 10-30 mg
Zinc Zn 2-5 mg
copper Cu 2-4 mg
molybdenum Mo 0.1-1 mg
boron B 2-5 mg
and huge amounts of carbon C but not making known whether it brings any benefit in a planted aquarium, it certainly will not replace co2 system or often used in small aquaria liquid carbon.
IMPORTANT!
Lignite in a freshwater aquarium is a huge stimulation of plants but it must be remembered that lignite has a lot of methane in its pores and using lignite without its previous treatment may cause the death of fish, shrimps and other inhabitants of our aquarium.
Other lignite functions
different species of South American cichlids (eg Uaru), red discus and angelfish use pieces of lignite as a surface for spawning.
– algae eaters spawn on the lignite and they eagerly use it as a hideout and eat it, thus providing the body with an indispensable portion of wood
Just like that. Lignite is a transition phase between peat and lignite. It contains around 70% of brown coal. It is a bad fuel material, so looking for it in fuel stores is practically pointless. Only brown coal mines remain. Lignite preserves the tree structure, unfortunately finding such pieces is extremely difficult. Therefore, I use properly prepared, smaller pieces of lignite, which after proper treatment, are ideal for planting by mosses, liverworts, anubias, Java fern. Lignite is quite easy to process, so basically every averagely complex tool can deal with various constructions made of this material.
How to craft lignite?
This question was asked to me several times. So I think that I should describe here this secret and mysterious operation, compared to which, Harry Potter’s spells are a piece of cake.
1. We process the lignite to the required shape using a cutting, sawing, drilling tools (manual or electric) or we do not process it. As you prefere.
2. If we want to use lignite as an additive to the substrate, we crush it into small pieces and add to the entire surface, you can also pulverise it and mix it with the substrate.
3. We thoroughly wash and rinse it
4. We put lignite in a container with water (jar, bucket, bathtub, pacific ocean) and keep it there for 5-6 weeks to rinse methane. We don’t boil it or pour boiling water over it. We don’t bathe it in water with salt.
5. Soaked lignite is planted with vegetation or added to the substrate or simply used as a decorative element in our aquarium.
6. When changing the arrangement, put the lignite back into the container with water, not allowing it to dry out. Otherwise, after drying and re-wetting, it may spill into pieces.
Does lignite stain water?
Yes and no. Yes, because containing so many humic compounds it must stain the water. And no, because a sufficient filtration of tank easily handles this light, golden-brown color. Especially if we use filter wool in one of the filter tanks. And finally … everything depends on the amount of lignite used. If we make a background and all the decorations of lignite, there will be a greater chance for a light water coloring. But this color is beneficial for plants.
How much lignite is needed as an addition to the substrate of the aquarium
250g should be enough for a 100L aquarium substrate, although there isn’t any hard and fast rule, you can easily use more. Lignite works well as an additive to substrate. As an independent substrate, it does not perform well.
Peat

Peat clean (without additives) is very poor in nutrients available for aquarium plants. However, thanks to its porous structure, it is an excellent substrate for nitrifying bacteria, so it supports biological filtration. From the point of view of plants, the most important advantage of peat is that it has a high sorption capacity, which means that saturated with a solution of fertilizers coming from the excrements of our fish, it stops the ingredients contained therein and they are easily accessible to plants.
Sour fibrous peat
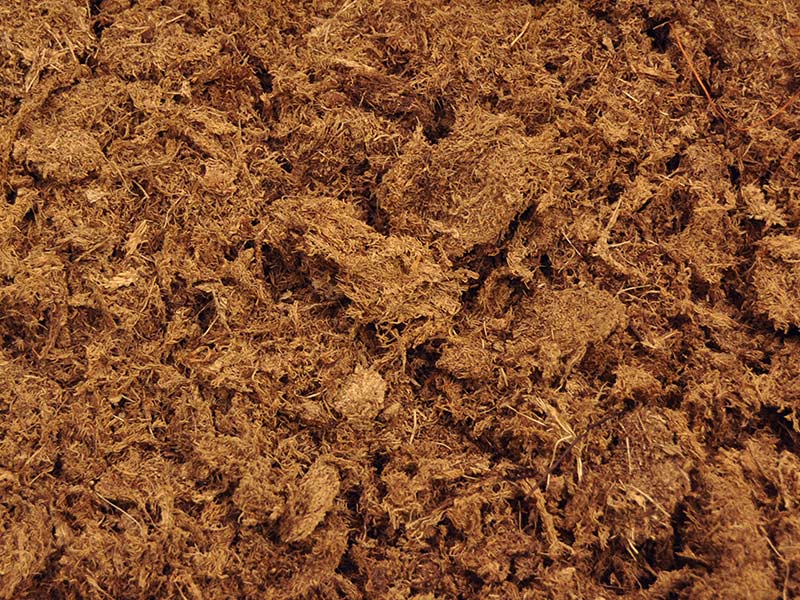
Sour fibrous peat
Is particularly beneficial to mud plants with a well-developed root system such as plants of the genus Vallisneria or Echinodorus. Low pH promotes the absorption of elements in the form of positively charged ions. It is also used as the aquarium and waterhole filter element, allowing to reduce the plague of algae, by releasing large amounts of tannins and lowering the pH of water.
In principle, apart from the requirements of fish, there are no contraindications to its use in the preparation of the substrate. Some trouble can be caused by pulling out the plants that overgrew the peat with roots. This is the price of a cheap solution, but with a thoughtful arrangement that will not require replanting of plants, this will not be a problem.
Good results are also obtained by using peat so-called “Low”. It has been used, for example, to produce an undergravel Danish Tropica substrate.
Activated carbon in the aquarium substrate

Activated carbon
It was once explained that anaerobic zones arise in aquariums and harmful substances such as hydrogen sulphide are released. Activated carbon served to absorb them. And hence the addition of this carbon is recommended here and there. However, it should be mentioned that carbon absorbs a lot of substances without looking at whether they are needed or not. Hence, it can, for example, absorb chelators used in fertilizers and thus reduce the fertilization level of the reservoir. Thus, giving carbon under the grit in planted aquariums is unnecessary and may even harm the cultivation of aquarium plants.
Oxygen bacteria that settle in the substrate are able to convert harmful substances into beneficial or harmless ones. It has been found that in densely planted aquariums in which plants are good, anaerobic zones are not created, so carbon is unnecessary. It would be useful only in general aquariums, but it is also problematic due to the consumption of carbon over time.
Free iron chelate? As the older generation did.
Often, aquatic plant leaves fade and turn yellow, aquarists usually suspect lack of potassium or micro / macro elements. Meanwhile, the lack of iron is usually responsible for this state of foliage. The plant needs it to be able to properly perform photosynthesis and get a beautiful green dye.
In the aquatic environment, we usually have a deficiency of this element. Of course, there may be a lot of deficiencies, but the method discussed always gave me visible effects on cryptocorynes and tape grasses. The way is so banal that that… take an iron nail, washed and degreased put in the sand under the root of plants and it’s done… The reactions taking place on the rusting nail will release the iron from which the plants will gladly use it. How this ingredient is desirable is illustrated by the fact that my plants literally rooted in such a nail, entangling and overgrowing it in addition. We can give several large transversally or crosswise, and also smaller for each plant. No worries, it’s not harmful to fish.

IMPORTANT: It must be an old type of nail, that is, whole made od iron, today you can buy nickel or stainless steel ones, such are not suitable and can even harm. How do you check if the nail is iron? You can see this look, the nickel is brightly shimmering, and we check it by dipping in water, then in a few days we see if rust has appeared on it. The nail can dissolve completely e.g. in 2 years, so every now and then we add new ones. It is important that it is placed in the sand and not in the ground.
Garden soil
Here, the patent can be completely fres, I will talk about it in a minute. We buy the cheapest one without fertilizer additives because even this is still several times more nutrient-rich than the plant substrate in nature. We can strain it through a big holes sieve to get rid of pieces of bark and rootlets. In the aquarium, we only add it up to a thickness of 1-5 cm depending on the need, or only in the place that we plan for plants. We squeeze it and knead it flat. If you plan more demanding plants, you can sprinkle the soil layer with fertilizer or sprinkle dry salt on the bottom. The soil absorbs the ingredients very well and then slowly gives back. When laying the ground, remember to keep a few centimeters from the edge of the aquarium. That’s why the black layer next to the glass will look unattractive, and under the influence of light it may start to “bloom”. If you don’t want to buy soil, you can use the ground from the molehill. We choose a place away from busy roads and we collect it from the mound. Recommended is roasting it in the oven but you can do as you prefer. If we add the soil, we will no longer use peat, but peat clay balls or only clay ones. Plan accurately the placement of plants and decorations in the aquarium, because if we change something and the soil gets out, it will be difficult to collect it and it will be able to significantly change the water parameters which will be shown by fish with their behavior. Some use thin mesh to prevent this, but in practice, it will only make transplanting more difficult. Initially, the plants can “stand still” but if they take little roots and reach the ground, they will start. If we want to make them easier to anchor in the soil, in the first layer, we add a bit of pebbles, and sand on that. There are no rules here, any idea will be good.
Combining these three ways we gain a much richer substrate than any purchase, on which, with the right lighting, you can grow the most demanding plants. The performance of such a substrate is 2-3 years on average, so I think it is worth it. What is important, it’s almost for free and made by yourself, which many of you will be more pleased with.
Gravel and sand
Gravel is definitely the most commonly used as a substrate in an aquarium. Gravel is the basis for rooting plants, however, it is not a source of inorganic substances and does not provide plants with any nutrients. In the trade we encounter gravel with varying degrees of granulation. The most suitable gravel is one that becomes more and more compact over time, which improves the development conditions of shallow-rooted plants. The smallest gravel is suitable for the development of plants. However, it often has sharp edges and is therefore not suitable for some demersal fish because it can cause scratches and cuts of the barbels. Species of fish such as spiny eels and bronze catfish prefer a substrate made of fine gravel. A slightly thicker gravel (pea size) is most commonly used in aquariums, because its edges are rounded and therefore doesn’t harm aquarium fish. Even thicker gravel is usually used in big aquariums with large fish. If the water should be alkaline and hard, make sure that the gravel does not contain calcium compounds. We adapt the color and brightness of gravel to lighting and species of the fish and aquarium plants. In general, we can assume that the most suitable gravel is one that is between 3 and 10 mm.
For lovers of a white substrate, we recommend to look at the dolomite, it doesn’t affect the water parameters.
Stones, crag and tail
Both natural and artificial in various sizes and shapes are available in the trade. Most often they are slates, granites and marbles. They do not affect the chemical properties of water. As in the case of gravel, we avoid calcium-containing rocks unless the fish we grow need hard and alkaline water. Make sure that stones don’t have too sharp edges. The most suitable are stones with large and flat surfaces, because they are the best to create hiding places for fish.
A substrate for bonsai trees and lava

Substrate of type akadama is just crushed lava. In some DIY stores you can sometimes find lava stones as a briquette, this is exactly the same but you have to crumble it. This substrate is a neutral material, but non-sterile, contains: manganese, magnesium, calcium, iron and potassium, but its great advantage is the porosity in which nitrifying bacteria are very easily developed. You should also note the use of lava tree as a substrate for fish stock, sharp edges of lava tree preclude its use in most cases. Lava stones can also be used as a filter media instead of popular ceramic discs and as natural elements of aquarium decoration.
As substrates, we do not use:
– sea sand, is usually too small and contains particles of broken shells (unless that’s what we want)
– stones with marked traces of metal compounds.
– too fresh and unadjusted branches and roots.
– various types of decorations that neutralize the natural character of the real environment.
In case of “Shop” substrates, the effects are similar to garden soil, although I do not think it would be more fertile than the soil. The price is relatively low, and we will not dirty the aquarium if it gets out accidentally. The efficiency of this substrate according to producers is even 5 years, this probably doesn’t convince most of us. The upside may be that there is quite a lot to choose from and most of manufacturers give a composition as well as a special substrate for specific conditions of aquarium.
JBL manado
Very popular brown-red substrate based on roasted clay. Facilitates taking roots and is also a “filter substrate” due to the granulation size. It has absorption properties, so we can enrich them by soaking for several days in a solution of any fertilizer for aquatic plants. Then dry and use.
Although it is one of the cheaper “artificial” substrates, I do not recommend it, because of the lightness – in case of digging fish, the pieces move around the aquarium. Without digging fish it is just as good as any grit or sand that covers the ground or store active substrate. I would not exaggerate with any special advantages or disadvantages of manado. It probably owes its popularity to the price.